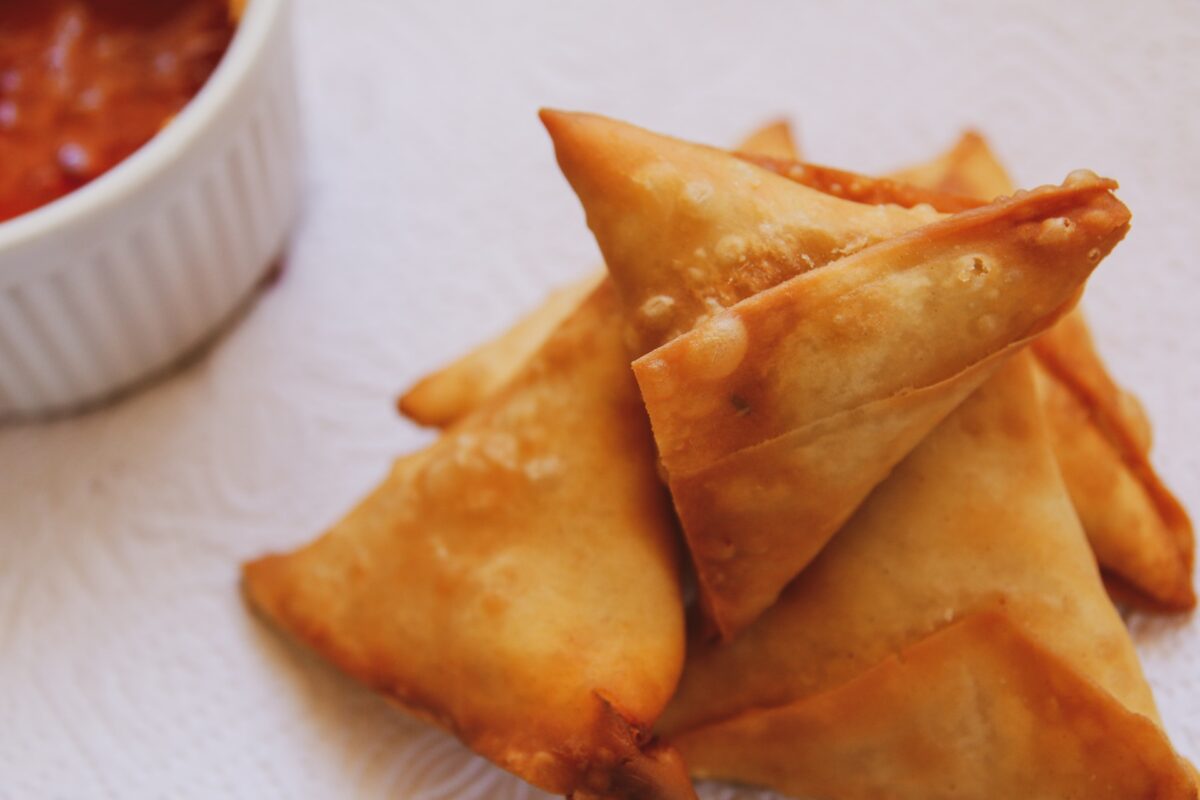
The art of preparing the perfect Samosa Puri or Pur as better known in South Africa – the crisp, flaky, and wonderfully layered wrapper for the much-loved Indian snack, the Samosa – is a tradition that has been passed down through generations. Yet, many people find the prospect of making samosa pur at home quite daunting. With this detailed guide, we hope to demystify the process and show you how easy it is to prepare perfect samosa pur in your own kitchen.
Ingredients:
- 2 cups of all-purpose flour (maida)
- 4 tablespoons of vegetable oil or ghee
- 1/2 teaspoon of carom seeds (ajwain)
- 1/2 teaspoon of salt
- Approximately 3/4 cup of water (adjust as needed)
- Additional flour for dusting
- Additional oil for deep frying
Method:
- Prepare the Dough: Start by mixing the all-purpose flour, carom seeds, and salt in a large mixing bowl. Now, add the oil or ghee to the mixture. Use your fingers to combine the ingredients, ensuring that every grain of flour is coated with oil. This is a key secret to achieving the desired flaky texture. The mixture should form a breadcrumb-like consistency.
- Knead the Dough: Gradually add water and start to knead. The dough for samosa pur should be firm – much harder than regular chapati dough. A stiffer dough holds its shape better during frying and forms a more rigid structure, which is ideal for a samosa. Knead the dough for about 10 minutes until it is smooth.
- Rest the Dough: Cover the dough with a damp cloth and let it rest for about 30-60 minutes. This resting period allows the gluten in the dough to relax, which makes the rolling process easier and also contributes to the flakiness of the pur.
- Roll the Dough: Divide the dough into small equal portions, about the size of a large lemon. Roll each portion between your palms to make it smooth and then flatten it. Dust your rolling surface lightly with flour, and roll out each portion into a circle, about 6 inches in diameter.
- Shape the Pur: Cut the circle into two equal semi-circles. Each semi-circle will form one samosa. Take one semi-circle, and moisten the straight edge slightly with water. Now, fold the semi-circle to form a cone shape, aligning the two corners of the straight edge to overlap slightly. Press the overlapped edges to seal the cone.
- Frying: Heat oil in a deep frying pan. Once hot, reduce the heat to a medium-low setting. This is another secret – a low to medium heat ensures the pur cooks all the way through and becomes beautifully crisp without browning too quickly. Fry the pur until golden brown on all sides.
Tips and Tricks:
- The key to perfect samosa pur lies in the dough. It should be stiff and well-kneaded. A soft dough will not yield the desired crisp and flaky pur.
- Resting the dough is critical. It helps in developing gluten strands that will give your samosa pur its structure.
- Always seal the edges of the samosa pur well, as this prevents it from opening up during frying. Using water or a flour paste as ‘glue’ is a traditional technique to ensure a good seal.
- Make sure your frying oil is hot before you drop the pur in. However, the temperature should be reduced to medium-low immediately after. This combination ensures your pur will be cooked evenly, without getting too browned on the outside before the inside is done.
Conclusion:
Making the perfect samosa pur is undoubtedly an art. But with practice, anyone can master this age-old tradition. We hope this guide has shed some light on the process and made it feel more approachable. Remember that cooking is a joyful experiment, so don’t be afraid to make mistakes along the way. Happy cooking!
Here are some recipes for the perfect samoosa fillings.